PROJECT INFORMATION
Unit Essential Questions:
What is the historical context of the world at the time of the kings and prophets?
What were the Empires that impacted the Biblical story?
How did the empires of the world impact God’s people?
Bible Text:
1 Kings 11:26-41, 1 Kings 12:1-24
Learning Goals:
Learners will be able to name the five important empires that impacted the biblical story.
Learners will create a “passport” to record their exploring and findings.
Teaching Points:
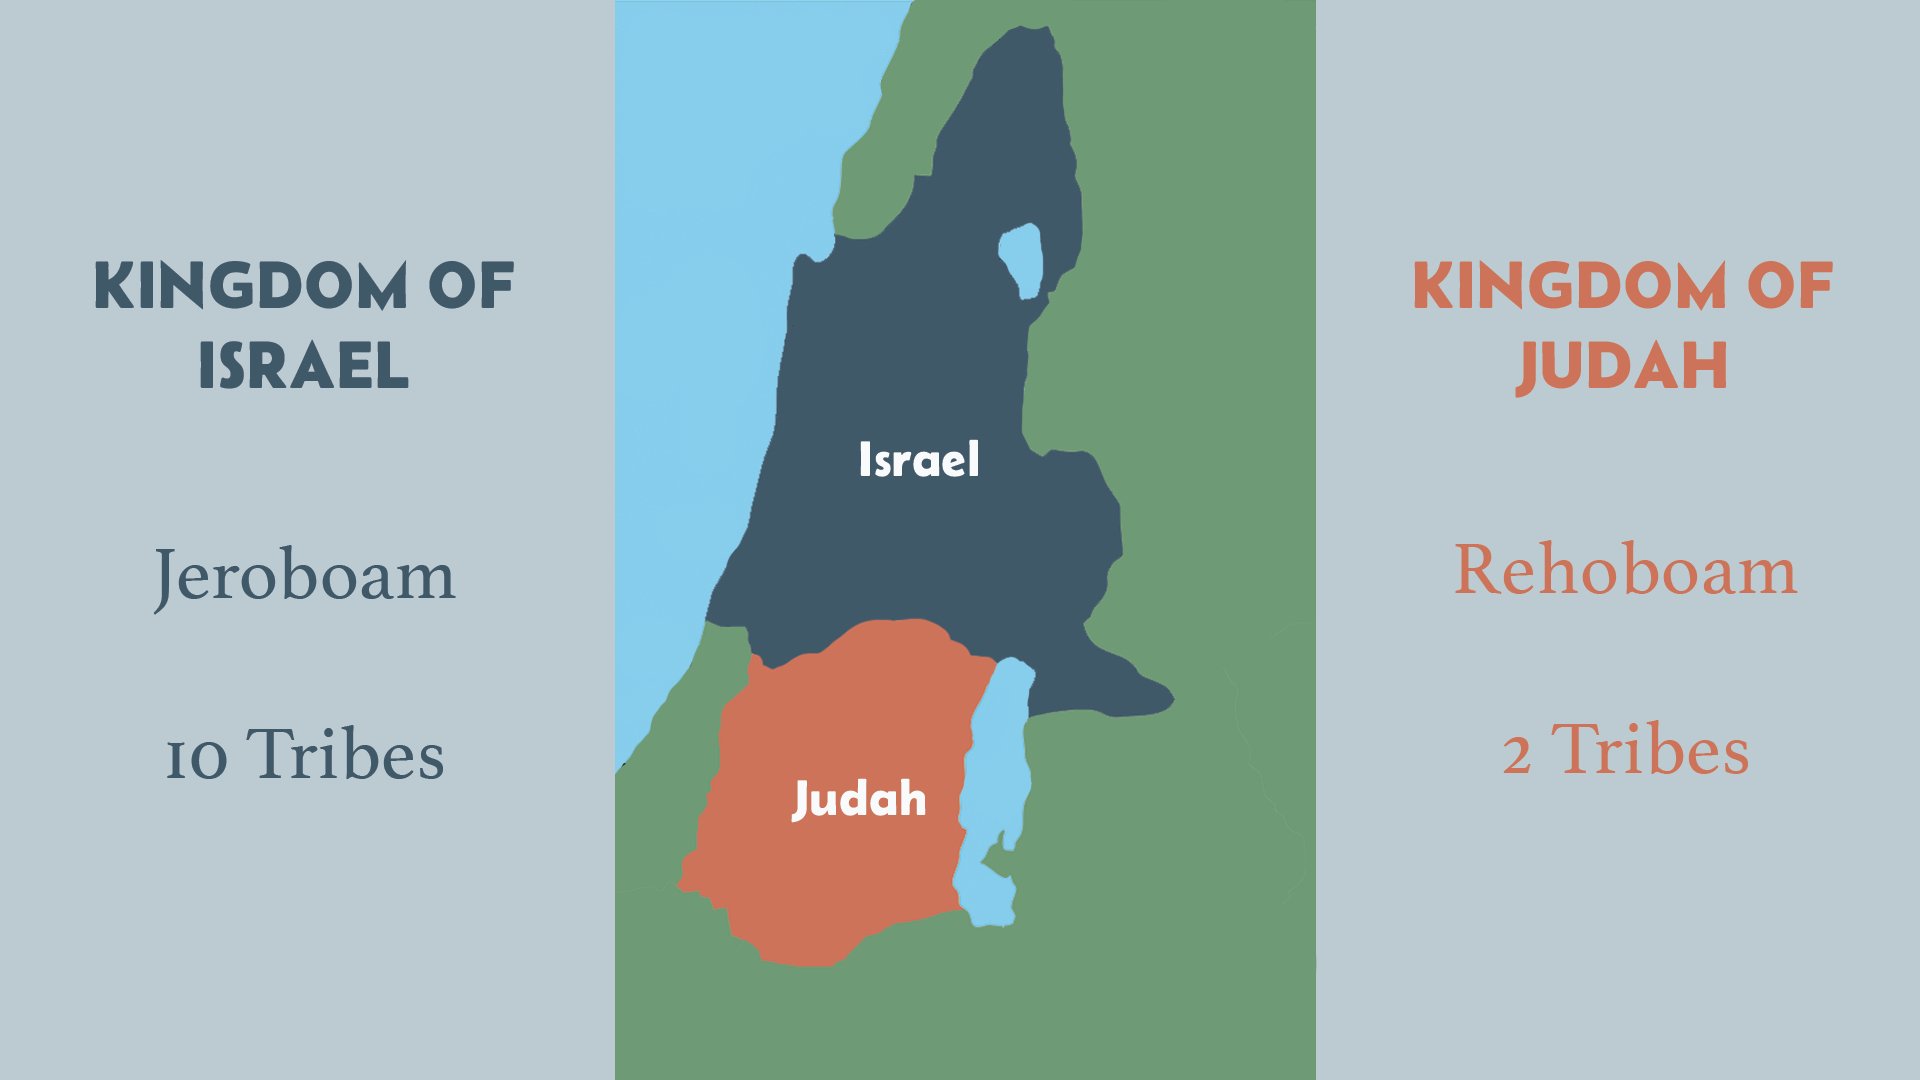
After the united monarchy of Saul, David, and Solomon, the kingdom divided into two kingdoms.
The Northern Kingdom followed Jeroboam, included 10 tribes, and was called Israel.
The Southern Kingdom followed Rehoboam, included 2 tribes, and was called Judah.
God’s people were greatly impacted by the empires of Assyria, Babylon, Persia, Greece and Rome.
PROJECT PREPARATION
This exciting project kicks off the "Kingdoms of the World" unit by immersing students in an interactive journey through five influential empires that shaped the background of the Biblical kings and prophets: Assyria, Babylon, Persia, Greece, and Rome.
To begin, students will create their own "time-traveling" passports. These passports will serve as personalized tools, allowing learners to document their explorations, engage with activities, and reflect on their discoveries. Each of the subsequent five lessons will include four hands-on activity stations, each highlighting a unique lens of context (historical, cultural, geographical, or biblical). The passports not only guide students through their journey but also act as a creative assessment tool for the unit.
Materials Needed
Printed passport templates (provided as a PDF file)
Printer with double-sided printing capability
Stapler (preferably a long-arm stapler for center binding)
Scissors (optional, if cutting is needed)
Writing utensils (pens or markers for students)
Step-by-Step Assembly Instructions
Print the Templates:
Open the provided PDF file.
Set your printer to print double-sided (flip on the short edge).
Print enough copies for each student in your class.
Arrange the Pages:
Ensure all printed pages are aligned in the correct order as per the PDF.
Double-check the layout so that the content flows properly when folded.
Fold the Pages:
Fold the stack of pages neatly in half to create a booklet format.
Press the fold firmly to ensure a clean crease.
Staple the Passport:
Use a stapler to bind the booklet along the center fold.
For best results, use a long-arm stapler and place 2-3 evenly spaced staples along the fold.
Personalize the Passports:
Write each student's name on the front cover or provide a space for students to write their names.
Distribute to Students:
Hand out the assembled passports at the start of the "Kingdoms of the World" unit.
Explain that they will use their passports to record activities, reflections, and findings during the unit.
PROJECT INTRODUCTION
Setting the Stage
Bible Reading: (Have each learner read a couple verses. If learners do not want to read just have them say, “pass”.)
Grab your Bibles! Let’s dive into 1 Kings 12:1-2 and read about an important character named Rehoboam.
But wait—who’s this other guy, Jeroboam? Let’s read 1 Kings 11:26-41 to find out!
Now, let’s see what happens to both Rehoboam and Jeroboam. Turn to 1 Kings 12:1-24, and we’ll read it together.
Here’s the big moment: The Kingdom splits!
10 tribes followed Jeroboam and formed the Kingdom of Israel.
2 tribes stayed with Rehoboam and formed the Kingdom of Judah.
(Slide 1: Divided Kingdom)
But guess what? Israel and Judah weren’t alone. They were surrounded by powerful empires that played a big part in their story. Over the next five weeks, we’re going to “time travel” to explore five major empires:
(Have students repeat after you as you say each name slowly and clearly.)
Assyria
Babylon
Persia
Greece
Rome
(Slide 2: Five Empires)
Time-Travel Passports
Before we can start exploring these empires, we need something important: a time-traveling passport!
(Pass out the passports to each student.)
These passports will help you:
Record what you learn about each empire.
Gather stamps after every “visit.”
Keep track of your adventures!
PROJECT INSTRUCTIONS
Spend the rest of your time filling out the inside of the passports. Here’s what to do:
Write your name and fill in your personal information (walk them through each section step by step).
Draw a picture of yourself (or attach a photo if available).
Decorate your passport to make it yours!
(Have art supplies like markers, crayons, and stickers available to make this fun and creative.)
When you’re done, hand your passports back to me so I can keep them safe for your upcoming adventures.
Lesson Files Include:
Lesson PDF
Presentations Files (Keynote, Power Point, Google Slides)
Station Posters
Passport Printout
Passport Stamp Printout
Passport stamp sticker sheets coming soon!
Contact info@lovegodloveothers.com if you are interested in trying out this unit with your students!


